
A smooth driveway greets every guest before your front door does. But if it is sunken or uneven, your guests may notice all the cracks, gaps, and tripping hazards. It looks tired and feels unsafe. But you do not need to demolish and replace the whole thing. You can revive it with the right tools, a plan, and a little grit. This guide will show you how.
An uneven driveway often has a simple cause. Soil movement, poor compaction, and tree roots can shift the concrete slabs. Water may creep beneath the surface and erode the soil. Over time, gravity wins and the concrete dips. The fix? Lift, level, and seal.
First things first—
Understanding Your Problem
Every driveway tells a story. The cracks and dips reveal the history of the soil underneath. So before touching any tool, study your driveway. Examine every section, tap the surface with a hammer, and listen for hollow sounds, they indicate air pockets below the slab.
Then, check the edges. If nearby tree roots push upward, note their position. Mark areas where rainwater pools after storms and look where slabs have sunk deeper than others. An in-depth assessment helps you understand the scale of the job ahead.
Last but not least, you must also check the driveway’s age because older concrete weakens with time. If it crumbles under pressure, resurfacing might not hold. In that case, lifting or replacing may be necessary.
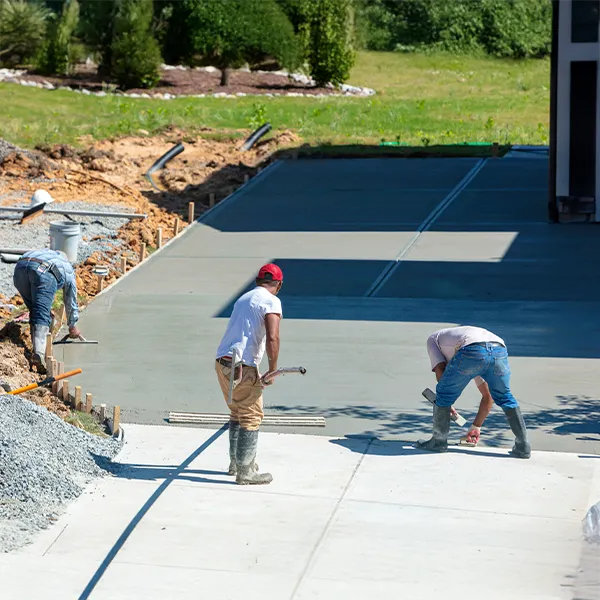
Step 1: Clean the Driveway Thoroughly
A clean surface forms the foundation of success.
- Begin by removing every loose particle.
- Sweep away leaves, dust, and debris.
- Use a pressure washer to blast off stubborn grime.
- Focus on oil stains or patches of moss. Dirt can block bonding agents from working effectively.
Allow the surface to dry completely. Never apply a resurfacer on wet concrete, as moisture can cause weak bonding and future cracks.
Step 2: Inspect and Repair Cracks
Now examine every fissure. Small cracks may seem harmless, but they grow over time.
- Use a chisel and hammer to widen the crack slightly.
- Create a “V” shape to help the repair compound grip better.
- Vacuum out dust and debris.
- Fill the crack with concrete patch/epoxy filler.
- Smooth it with a trowel.
- Let it cure according to product instructions.
Patience is crucial here. Rushing this stage can undo your hard work later.
If sections of the slab have sunk more than you thought, consider slab jacking or mudjacking. This technique pumps a concrete-like mixture beneath the slab. The pressure lifts it back into position. It saves time and money compared to full replacement.
Step 3: Apply the Bonding Agent
The bonding agent acts like glue by aiding the new layer stick to the old one.
The process is simple. Just use a roller or brush to spread it evenly with the manufacturer’s directions in mind. Some bonding agents need to dry until tacky, while others require immediate resurfacing while wet. Know what your bonding agent requires, as this is key to the entire process.
Never skip this step as Without bonding, the resurfacer can peel away under heat or pressure.
Step 4: Mix the Concrete Resurface
Pour the resurfacer into a clean bucket or mixer, add water gradually, and stir until smooth. The consistency should resemble pancake batter, thick but pourable. However, you should avoid lumps. They can ruin the surface texture.
Then, work in small batches, as the resurfacer dries fast. So, prepare only what you can spread in 20 to 30 minutes.
Step 5: Pour and Spread the Mixture
Now, start at one end of the driveway and pour the resurfacer slowly. Spread it using a trowel or long-handled squeegee, maintaining even thickness throughout. Work swiftly but with precision, Each stroke should flow in the same direction. If you see bubbles, pop them with a trowel edge.
Step 6: Don’t Miss Texture
Now, start at one end of the driveway and pour the resurfacer slowly. Spread it using a trowel or long-handled squeegee, maintaining even thickness throughout. Work swiftly but with precision, Each stroke should A completely smooth surface can become slippery when wet. But texture can add both traction and charm. Take a broom or textured roller and drag it lightly across the surface while the mixture is still wet. Straight, even strokes create a professional finish.
Patterns can also add flair. You can choose diagonal lines or a fan pattern for style. Let creativity play a small part here.
Step 7: Let It Cure
Curing demands patience. Keep vehicles and heavy objects off the surface for at least 24 to 48 hours. Avoid foot traffic also during this time, as the material must harden without any disturbance.
Step 8: Bring the Sealer
Once cured, seal the driveway. This step guards against stains, moisture, and sun damage. Just apply it using a roller or sprayer, and make sure the coat is even. Allow it to dry completely before using the driveway again.
A sealer gives your surface a subtle sheen. It also locks in the fresh, uniform look.
Common Mistakes to Avoid
- Do not rush surface preparation. Dirt weakens bonding.d
- Do not skip curing time. Uncured concrete cracks easily.
- Do not over-water the resurfacer. It ruins the consistency.
- Do not apply sealer too soon. Wait until the surface has cured properly.
Mistakes often stem from impatience. Slow, steady progress creates durable results.
Final Thoughts
Repairing a driveway is not just maintenance. It is the renewal that every home deserves. And with the right hands and a bit of determination, even the damaged surfaces can rise again, stronger, smoother, and stunning.
If you are ready to give your driveway this much-needed makeover, you can connect with our team at Premium Concrete Resurfacing. You can reach us via phone or email and explore what we can do for you.
We await your call.